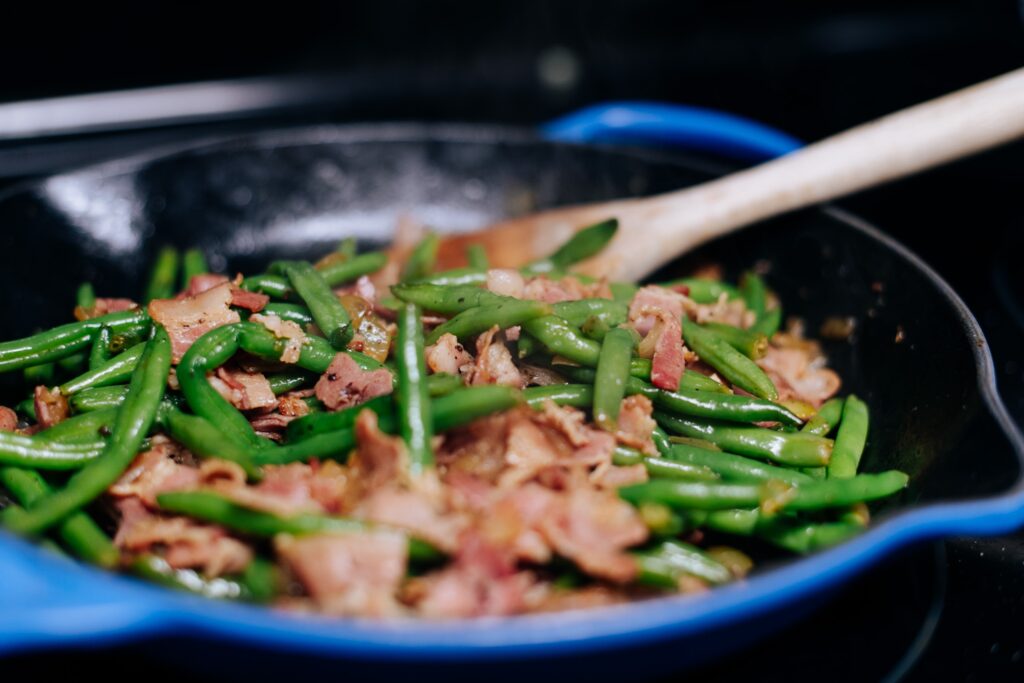
Green Beans, Bacon, Onion: the Perfect Side Dish!

Here's a simple recipe for a green beans, bacon, and onion side dish, perfect for enjoying the bounty from Gentry Homestead. You can find our fresh produce here at the homestead, or at Grindstone Gardens in Mcdonald TN. You can also (soon) find our Kunekune pork, for sale on our website with local pick up option!

Green Beans, Bacon, and Onion Side Dish

Ingredients:

Instructions:

  1. Preparation: Wash and trim the green beans. Thinly slice the onion and cut the bacon into small pieces.
  2. Cook Bacon: In a large skillet, cook the bacon pieces over medium heat until crisp. Remove the bacon and set aside, leaving the rendered fat in the skillet.
  3. Sauté Onions: In the same skillet with the bacon fat, add the sliced onions. Sauté over medium heat until they become translucent and slightly caramelized, about 5-7 minutes. Add garlic if using, and cook for another minute.
  4. Cook Green Beans: Add the green beans to the skillet. Stir to coat them with the bacon fat and onions.
  5. Add Liquid: Pour in the chicken broth or water and bring it to a simmer.
  6. Cover and Cook: Cover the skillet and let the green beans cook for about 10-15 minutes, or until they reach your desired level of tenderness.
  7. Season: Uncover the skillet, add the cooked bacon back in, and season with salt and pepper to taste.
  8. Serve: Once everything is well-mixed and heated through, transfer the mixture to a serving dish!

The Art of Collecting and Using Rose Petals at Gentry Homestead

Greetings from the serene rose gardens of Gentry Homestead! Our property is resplendent with lush, vibrant rose bushes that are more than just picturesque landscaping elements; they are also a treasure trove of beautiful and fragrant rose petals. Over the years, we've perfected the art of collecting these petals, and we're excited to share this journey, from petal plucking to using them in various delightful ways.

The first step is the collection process. Typically, we gather petals in the morning after the dew has dried but before the midday sun, when the roses are at their most aromatic. We choose only the healthiest and most vibrant roses, leaving any browning or damaged petals behind. We approach the bushes with care, remembering to prune properly for the plant's health and future growth. Gentle handling is crucial; we aim to keep the petals intact, ensuring their natural oils remain undisturbed.

After collecting a bounty of petals, we initiate the drying process. To begin, we spread the petals in a single layer on a flat surface lined with parchment paper. We favor air-drying in a dark, dry space with good air circulation, usually taking around one week. A faster alternative is the oven method. We set the oven to its lowest setting, usually under 200 degrees Fahrenheit, and leave the petals for about two to three hours. Whichever method used, the goal is to dry the petals without losing their vibrant colors and enchanting aroma.

Once we have our dried petals, we can start exploring their myriad uses. A favorite at Gentry Homestead is to use them for making rose petal tea, a fragrant and calming drink that pairs perfectly with our homemade biscuits. The petals also make a fantastic ingredient in rose-infused oil, which is used for aromatherapy or as a base for beauty products like lotions and body scrubs.

Another popular use is creating potpourri. The mix of dried rose petals and other aromatic plant materials adds a pleasant, natural scent to homes. In culinary arts, the rose petals serve as an exotic element, from adding a floral touch to salads and desserts to making rose water and rose-flavored jellies and syrups.

Finally, the dried rose petals make wonderful gifts. Whether packaged in an elegant jar for potpourri or included in a personalized tea blend, they offer a piece of the tranquility and beauty we enjoy daily at Gentry Homestead.

We take immense pride in our roses, and it's an honor to share the delight of their petals with you. Through collecting, drying, and utilizing these petals, we hope to bring a piece of our verdant rose garden into your life, no matter where you are.

From Seed to Stand: Growing Carrots at Gentry Homestead

At Gentry Homestead, we've always believed in the power of learning, experimenting, and perfecting the art of farming. A cornerstone of our produce offerings are our homegrown carrots - sweet, vibrant, and fresh from our land. Over the years, we've honed our methods, diverging from conventional gardening and embracing an innovative approach that we find maximizes yield and simpleness. We grow our carrots in raised beds and use a unique seed-thinning method that involves sand, which has revolutionized our growing process. We're excited to share our journey, from seed to harvest to selling at our beloved local farmstand, Grindstone Gardens.

Planting Carrots: A Raised Bed Adventure

At the start of every growing season, we eagerly get our raised beds prepared. Raised beds offer many benefits that make them a perfect fit for carrot farming. They provide better drainage, preventing waterlogged soil which is detrimental to carrot growth. The loose, well-aerated soil in raised beds also enables the carrots to grow straight down and develop a nice shape. Plus, raised beds make the harvesting process a breeze – more on that later.

But the magic truly begins when we plant our carrot seeds. Carrots, like all root vegetables, are typically grown from seed rather than transplants. Direct sowing ensures a healthy root development. The challenge with carrot seeds, however, is that they're tiny and can easily clump together, leading to overcrowded carrot seedlings that have to be thinned later on.

To overcome this challenge, we employ an ingenious technique: mixing carrot seeds with sand. This creates a seed-sand blend that helps to evenly distribute the seeds when sowing. We simply sprinkle this blend onto the surface of our prepared beds. It’s an easy, efficient method that ensures the seeds don't clump together, allowing each one the space it needs to grow and thrive. Consequently, we skip the labor-intensive thinning process altogether.

Watching Them Grow: The Carrot Lifecycle

Once the seeds are sown, the waiting game begins. Carrots usually take about 2 to 3 weeks to germinate. Keeping the top layer of soil consistently moist during this period is crucial, as the seeds need moisture to germinate. This is yet another reason we love our raised beds - they help maintain optimal soil moisture balance.

After germination, the carrot plants start their journey to maturity, which typically takes about 2 to 4 months, depending on the variety. Regular watering and weeding are key during this phase to ensure healthy growth.

Harvesting Made Easy

When it's time for harvesting, our raised beds really shine. Because the soil in raised beds is loose and well-aerated, we can harvest our carrots with ease, simply by pulling them up. There's no need for digging tools which could potentially damage the delicate roots. The height of the raised beds also makes the process easy on the back, eliminating the need to bend over constantly.

The Fruits of Our Labor at Grindstone Gardens

After a rewarding harvest, our fresh, farm-grown carrots make their way to Grindstone Gardens, Mcdonald TN's local farmstand. It's a place where the community comes together to appreciate and buy local produce, including our carrots, fresh from the soil. Customers love the sweetness and crunch of Gentry Homestead carrots, often commenting on how they can taste the difference.

In conclusion, growing carrots at Gentry Homestead is a labor of love, a blend of science, art, and a little innovation. From the seed-sand sowing method to the use of raised beds, our unique process ensures a bountiful harvest of sweet, crunchy carrots each season

The Benefits of Free-Ranging Laying Hen Chickens

At Gentry Homestead, we've seen firsthand the advantages of a free-ranging lifestyle for our flock of over 50 chicks, hens, and roosters. This method, which allows our chickens to roam and explore our verdant pastures, brings about numerous health, environmental, and ethical benefits that set us apart from conventional poultry farms. Let's delve into the benefits of this forward-thinking, sustainable farming practice.

To start with, free-ranging is fantastic for chicken health and wellness. Chickens that are free to roam outdoors, pecking, scratching, and exploring, are typically healthier and happier. They enjoy a more diverse diet by foraging for bugs, grasses, and seeds, which in turn results in a boost to their nutritional health. Consequently, they produce higher-quality eggs with more vibrant yolks and stronger shells, thanks to the natural vitamins and minerals they glean from their varied diet.

Additionally, their physical health is improved. The activity of roaming prevents obesity, a common issue among confined chickens, and helps to naturally control pests, reducing the need for chemicals and antibiotics. It also decreases stress levels, leading to less feather pecking and other anxiety-related behaviors. As a result, our birds at Gentry Homestead are less susceptible to diseases, leading to lower mortality rates compared to those raised in confinement.

Free-ranging doesn't only benefit our chickens' health but also enriches our environment. Chickens are natural composters. As they scratch and peck, they break down organic material, improving soil fertility. They also help control pests, reducing the need for chemical pesticides. Chickens provide natural manure, which is an excellent fertilizer, enhancing the vitality and productivity of our land. This way, our chickens contribute to the sustainability of our homestead, helping us maintain a healthy, vibrant ecosystem.

Moreover, free-ranging provides significant ethical advantages. Allowing chickens to engage in their natural behaviors and providing them with a high-quality life reflects our commitment to ethical farming practices. At Gentry Homestead, we believe in raising our chickens with respect and dignity, acknowledging them as sentient beings deserving of a fulfilling life. This approach not only resonates with consumers who value animal welfare but also gives us, as farmers, a sense of pride and satisfaction in our work.

Finally, consumers are becoming more discerning, showing a preference for free-range eggs and poultry because they taste better and are more nutritious. They are also increasingly concerned about animal welfare and sustainable farming practices. This shift in consumer behavior provides a compelling economic argument for the free-range system. Our poultry products at Gentry Homestead stand testament to this consumer shift, with demand consistently high for our wholesome, ethically produced eggs and meat.

In conclusion, at Gentry Homestead, our decision to raise free-ranging laying hen chickens is not just a farming choice; it is a commitment to sustainable and ethical farming practices. It brings about healthier and happier chickens, contributes positively to the environment, aligns with ethical farming practices, and meets the growing consumer demand for animal-friendly, eco-friendly food. In the face of increasing awareness about the shortcomings of factory farming, we believe that free-ranging represents the future of poultry farming. We look forward to continuing to provide high-quality, ethically produced eggs and poultry to our valued customers.

A Gardener's Guide: The Art of Collecting, Washing, Drying, and Storing Tomato Seeds for the Next Season

Hello, dear readers! Today, we're delving into a particularly rewarding aspect of home gardening: collecting and storing tomato seeds. By harvesting your own seeds, you ensure that you are growing true-to-type, preserving your favorite varieties, and saving a bit of money in the process. Let's take a journey together from a ripe, juicy tomato to a tiny seed ready to sprout the next season.

We'll be focusing on some of our favorite varieties: San Marzano, Heirloom, Black Plum, Cherry, Old German, Chocolate Stripes, Beefsteak, and Cherokee Purple. All of these varieties are unique in taste, color, and size, but they share a common process when it comes to seed collection.

Step 1: Choosing and Collecting Seeds

The first step in collecting tomato seeds is to select a ripe, disease-free fruit from the variety you wish to propagate. It's vital to choose tomatoes that exemplify the characteristics you want in next year's crop. For instance, if you want a tangy, full-flavored San Marzano or a juicy, sweet Cherry, choose the best specimen from your current crop.

Cut the tomato across the middle, not from the stem to the bottom, but sideways. This gives you a clear view of the seed cavities. Gently squeeze out the seeds or scoop them out with a spoon, making sure to include the surrounding gelatinous material, which contains important fermenting agents for the next step.

Step 2: Washing and Fermenting

Next, we move to washing, which also involves a fermentation process. Place the seeds and the gelatinous substance into a glass or plastic container. Add a bit of water, enough to make the mixture soupy but not overly diluted. Cover the container with a breathable material like cheesecloth and secure it with a rubber band.

Set this mixture aside in a warm place, but not in direct sunlight. Allow it to ferment for 2-5 days, stirring daily. The fermentation process helps to remove the gelatinous coating that contains germination inhibitors. You'll know it's ready when a layer of mold appears on the surface (this is a good sign!) and the seeds separate and sink to the bottom.

Step 3: Rinsing and Drying

After fermentation, it's time to rinse and dry the seeds. Pour off the mold and excess pulp, add water, swirl, and carefully pour again, keeping the viable seeds that sink at the bottom. Repeat this process until the water is clear and only the seeds remain.

Next, drain the seeds and spread them out on a non-stick surface such as a ceramic plate or a glass tray. Do not use paper towels as the seeds can stick to them. Make sure they are spread out thinly, with none overlapping. Place the tray in a well-ventilated location out of direct sunlight to dry.

Drying times can vary from a few days to a couple of weeks, depending on your local climate and humidity levels. You'll know they're completely dry when they can be easily separated and they break in half when bent.

Step 4: Storing the Seeds

Once dry, store your seeds in an airtight container like a glass jar or envelope. Label the containers with the variety and date. Store them in a cool, dark, and dry place until you're ready to plant them in the next season. Properly stored tomato seeds can remain viable for up to six years, although germination rates generally decrease over time.
Egg Production → Turkey Transition

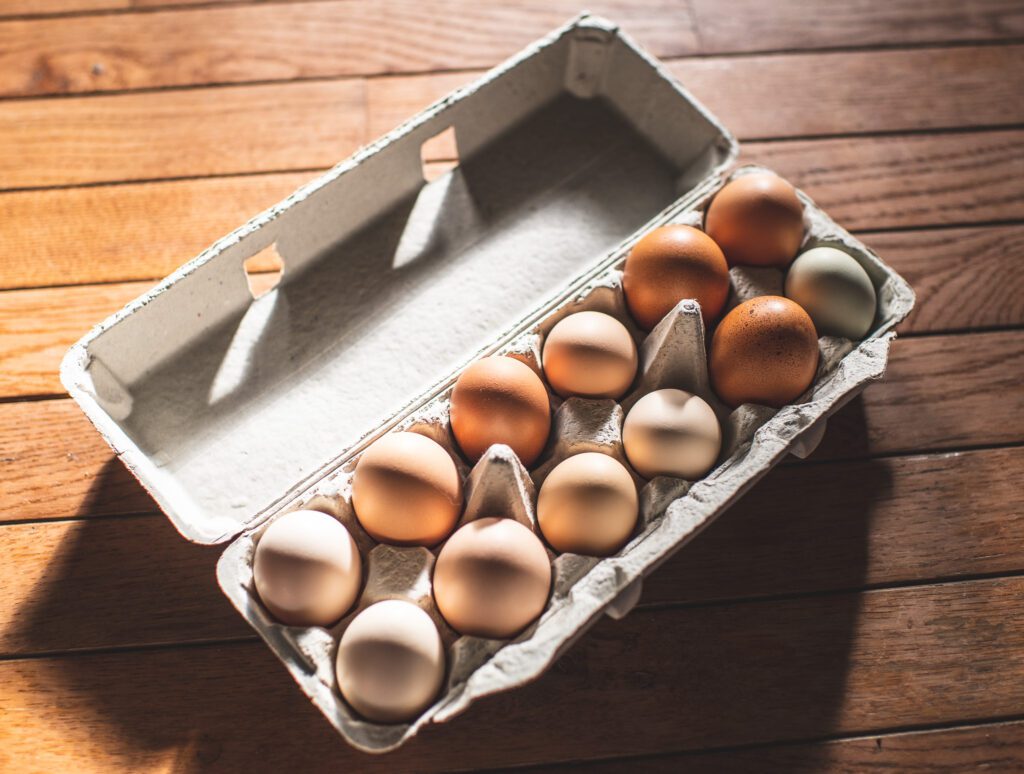
At Gentry Homestead, we are committed to providing our local community with fresh, nutritious eggs from happy and healthy pasture-fed chickens. To achieve this, we hatch our own chicks through incubation and raise them with care to ensure they thrive and produce high-quality eggs. Our pasture-fed chickens are given ample space to roam, forage, and graze on grass, insects, and other natural food sources. This approach not only ensures that our chickens are healthy and happy, but also results in eggs that are rich in nutrients and have a delicious, distinct flavor.

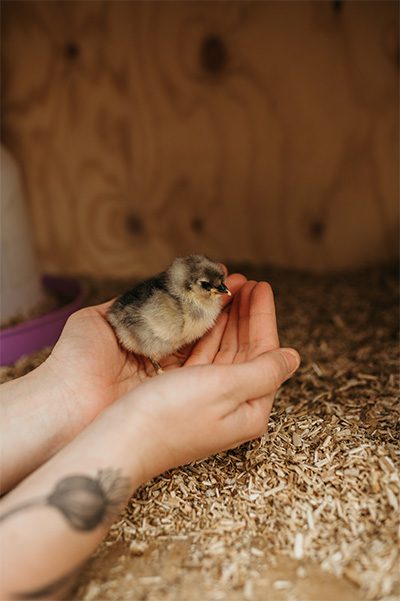
To hatch our own chicks, we use an incubator that maintains the optimal temperature, humidity, and ventilation levels required for successful hatching. We carefully select fertile eggs from our own flock, and place them in the incubator. Over the course of 21 days, the eggs are turned regularly and monitored closely to ensure they are developing properly. Once the chicks hatch, they are moved to a brooder box where they are kept warm, fed, and watered until they are ready to be moved outside.

DSC 1702 1 2

Raising pasture-fed chickens requires careful attention to their needs and behaviors. At Gentry Homestead, we prioritize the health and welfare of our chickens by providing them with access to fresh water and high-quality feed, as well as plenty of space to move and forage. By raising our chickens in this way, we are able to offer our local community fresh, delicious eggs that are rich in nutrients and produced with care and integrity.

Our eggs are available for purchase on our website, as well as at the local farmstead Grindstone Gardens. We have new chickens every year to ensure that our hens lay eggs consistently and that we are able to meet the demands of our local community. We take pride in providing our customers with fresh, healthy, and ethically-produced eggs, and are committed to continuing to raise pasture-fed chickens with care and attention.

As part of our commitment to providing our local community with high-quality, pasture-raised poultry, we are also excited to announce that we are starting to incubate our own turkey eggs. This new endeavor on our homestead will allow us to offer fresh, delicious turkey for families to enjoy at Thanksgiving and other special occasions. Just like our chickens, our turkeys will be raised with care and attention, and given ample space to forage and graze. We are excited to expand our offerings and provide our community with a wider range of ethically-raised, farm-fresh poultry.

Kunekune Pigs

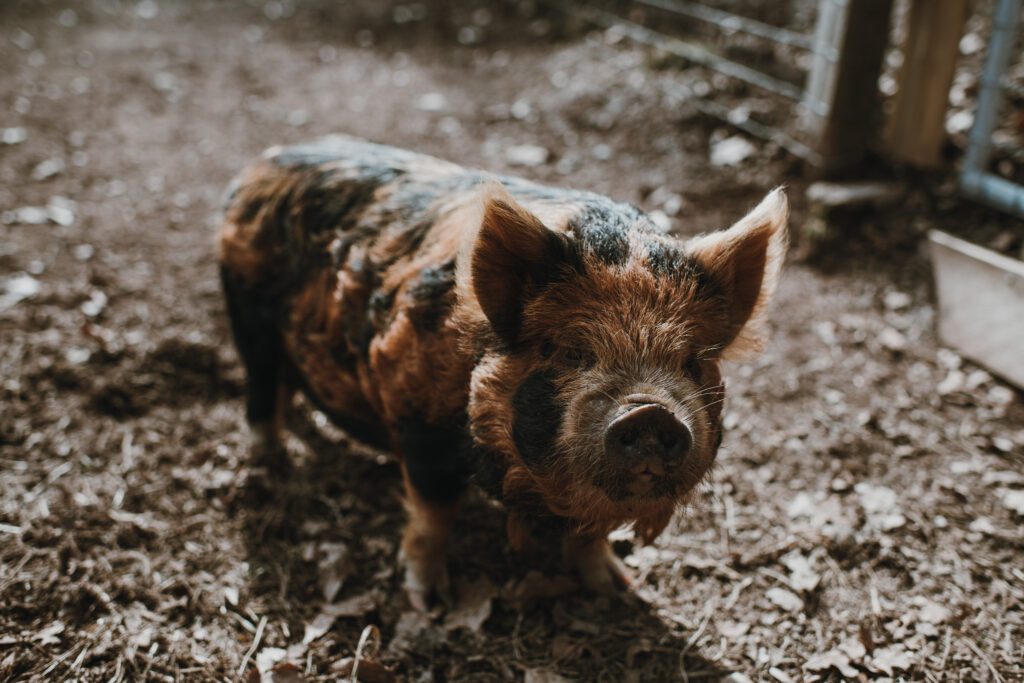
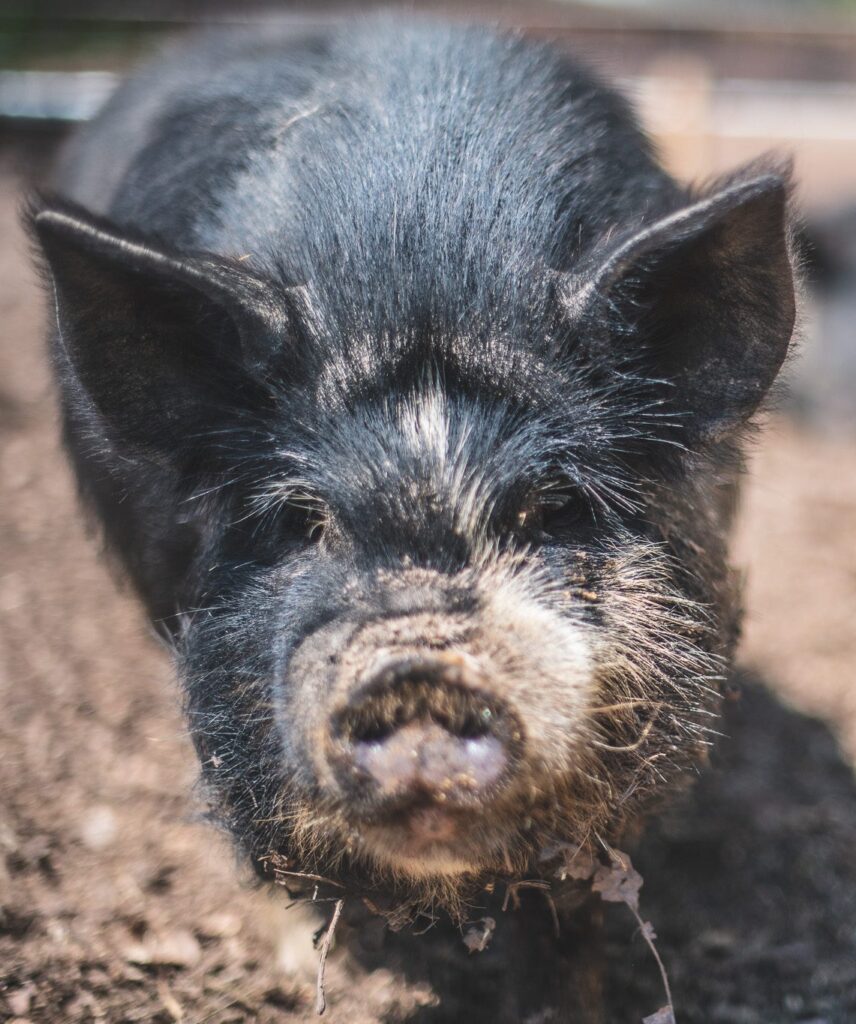
Kunekune pigs are a unique breed of domesticated pig that originated in New Zealand. The word "Kunekune" means "fat and round" in the Maori language, which is an apt description of these pigs. The breed was developed by the Maori people of New Zealand, who bred small, colorful pigs for food and cultural purposes. The pigs were kept as a domesticated animal and allowed to roam freely in the villages. However, as agriculture became more industrialized in New Zealand, Kunekune pigs nearly went extinct. Fortunately, a small group of enthusiasts began breeding and preserving the breed in the 1970s. Since then, Kunekune pigs have gained popularity worldwide as a unique and friendly breed of pig that is well-suited for small farms and backyard homesteads.

At Gentry Homestead, we are committed to being self-sufficient and providing our local community with high-quality, pasture-raised pork. That's why we decided to add Kunekune pigs to our homestead. Not only are they a unique and friendly breed of pig, but they are also well-suited for small farms and require minimal space and inputs. Kunekune pigs are excellent foragers and thrive on a pasture-based diet, which aligns with our sustainable farming practices. By raising these pigs on our homestead, we are able to offer our customers a delicious and healthy alternative to conventionally raised pork, while also supporting our local food system.

489499537 dsc 1786

As part of our commitment to providing our community with high-quality, sustainable pork, we have established a breeding program for Kunekune pigs at Gentry Homestead. By breeding our own pigs, we can ensure that they are born and raised on our homestead and fed a nutritious, pasture-based diet. This approach not only ensures the health and welfare of the pigs but also supports our mission of being self-sufficient and sustainable. Starting in the winter of 2023, we will be offering pork cuts for purchase on our website. These cuts will be from our own Kunekune pigs, and will be processed at a local USDA-inspected facility. We will offer a range of cuts, from bacon and sausage to pork chops and roasts, all with the exceptional flavor and quality that comes from pasture-raised pork. We are excited to share our pork with our community and to promote sustainable, local agriculture.

DSC 2406 e1685738768776

We take pride in our Kunekune breeding program and strive to produce healthy, quality pigs that meet the standards set forth by the American Kunekune Pig Preservation Society (AKKPS). To this end, we have carefully selected a few breeding pairs of AKKPS registered Kunekune pigs that exhibit excellent conformation, temperament, and meat quality. As part of our commitment to the preservation of this unique breed, we will also be offering the ability to purchase AKKPS registered Kunekune piglets for $500-600, with registration papers included. These piglets will be born and raised on our homestead, and will be socialized with humans and other animals from an early age to ensure their friendly and docile temperament. We are excited to offer these exceptional piglets to others who share our passion for sustainable agriculture and the preservation of rare and heritage breeds.

At Gentry Homestead, we are thrilled to offer our community the opportunity to taste the exceptional flavor and quality of pasture-raised Kunekune pork. We take pride in our commitment to sustainable and humane farming practices, and believe that the quality of our pork reflects this. By offering pork cuts for purchase on our website, we hope to provide a convenient and accessible way for our community to enjoy healthy, delicious, and ethically-raised pork. We are dedicated to continuing to feed our local community with integrity and good farming practices, and we believe that Kunekune pigs are an important part of this vision. We are grateful for the opportunity to share our love for farming and our passion for delicious, healthy food with our community.

Dexter Cattle

Welcome to the Gentry Homestead, a place where sustainable living and love for the environment go hand in hand. Our family farm is committed to preserving the land for future generations while providing wholesome food for our family. One of the ways we achieve this is by raising Dexter cattle, a breed known for its exceptional beef quality and suitability for small-scale farming. Join us as we explore the history of Dexter cattle, their usage on a homestead as a beef cow, and the benefits of grass-fed beef.

Dexter Cattle: A Rich History

Infused Feature 2 800x.jpg

The Dexter breed, named after a Mr. Dexter who first imported the cattle to England in the early 1800s, originated in Ireland. These small yet hardy cattle have a storied history, and their ability to adapt to various climates and environments has made them a popular choice for homesteaders across the globe. Dexter cattle have earned a reputation for being docile, easy to handle, and highly efficient grazers, making them an ideal choice for sustainable farming practices.

The Role of Dexter Cattle on the Homestead

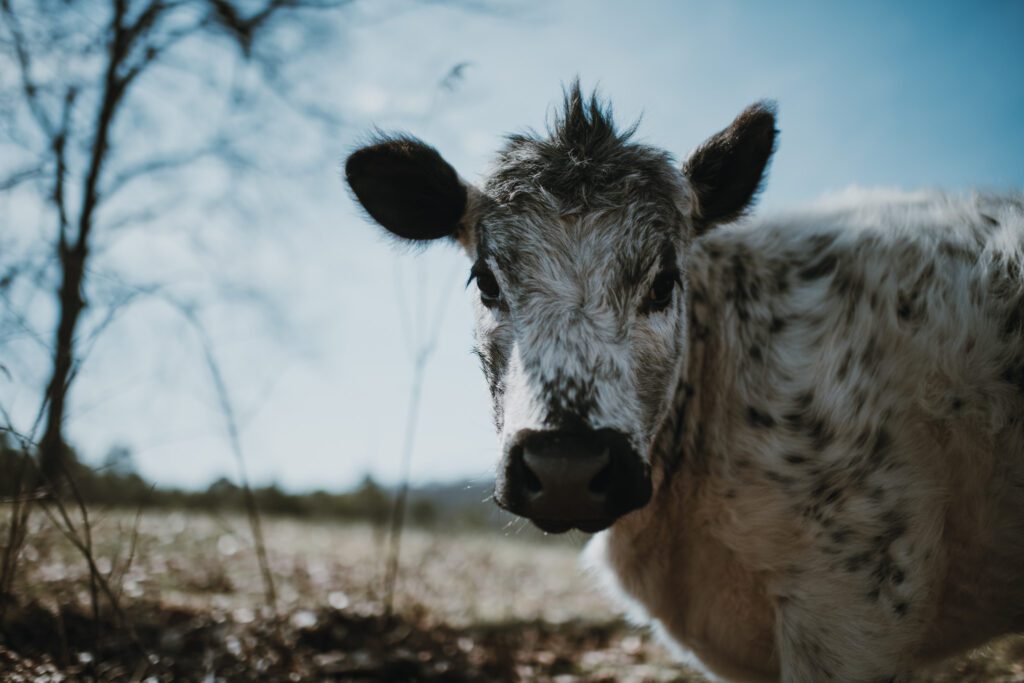
At Gentry Homestead, our Dexter cattle serve a dual purpose: providing a sustainable source of beef for our family and contributing to the preservation of our land. We maintain a small herd, consisting of two heifers, which we breed using artificial insemination to produce calves. These calves are then raised on our homestead, ensuring that our beef is born and raised in the most natural and loving environment possible.

The Benefits of Grass-Fed Dexter Beef

DSC 1830

Grass-fed beef has gained increasing popularity in recent years due to its myriad health benefits and environmental sustainability. Our Dexter cattle are raised on a diet of lush grasses, which not only contributes to the unparalleled flavor and tenderness of the meat but also provides a more nutrient-dense product. Grass-fed beef is known to be higher in Omega-3 fatty acids, Vitamin E, and conjugated linoleic acid (CLA) - all of which contribute to overall health and wellness.

By raising our cattle on a grass-fed diet, we also promote the health of our land. Grazing cattle help to maintain and improve the quality of our pastures by stimulating grass growth and recycling nutrients back into the soil. This sustainable approach to farming supports the biodiversity of our land and ensures that we are leaving a positive impact on the environment.

The Gentry Homestead Philosophy

At Gentry Homestead, our focus on sustainability and self-sufficiency guides every decision we make. Raising Dexter cattle allows us to provide our family with the highest quality beef while simultaneously caring for the land we love. Although we do not sell our beef, we are proud to share our experiences and knowledge with other homesteaders and farmers who share our passion for sustainable living. We believe that by working together and learning from one another, we can create a brighter future for generations to come.

Chicken Incubation

Have you ever thought about incubating and raising your own chickens? Not only can this provide you with a steady source of fresh eggs or meat, but it also allows you to have a closer connection to your food sources and know exactly where your food comes from. In this blog post, we'll walk you through the process of incubating chicken eggs and raising chicks in a brooder box. From preparing the incubator and setting up the brooder box to caring for the chicks as they grow, we'll cover everything you need to know to successfully raise your own flock of chickens. So if you're ready to embark on this rewarding and sustainable journey, let's get started!

If you're new to incubating chicken eggs, it may seem like a daunting process at first. But with the right tools and knowledge, it can be a rewarding experience that leads to a healthy flock of chickens. Here are the steps to follow when incubating chicken eggs:

chicken incubation
  1. Prepare the incubator: Before you start incubating eggs, make sure your incubator is clean and disinfected. This will help prevent the spread of bacteria and disease. Follow the manufacturer's instructions for cleaning and set-up.
  2. Ideal temperature and humidity: The ideal temperature for incubating chicken eggs is around 99.5°F (37.5°C). Humidity should be around 50-55% during the first 18 days of incubation and then increased to 65-75% during the final three days. You can measure temperature and humidity using a thermometer and hygrometer.
  3. Set up the incubator: Place the incubator in a stable location, away from drafts and direct sunlight. Follow the manufacturer's instructions for setting up the incubator and placing the eggs inside.
  4. Place the eggs: Place the eggs in the incubator with the larger end facing up. You can mark each egg with an X on one side and an O on the other side to help you keep track of which side you turned the egg on. Turning the eggs regularly, such as three times per day, is important to prevent the embryo from sticking to the shell.
  5. Monitor the eggs: Monitor the temperature and humidity regularly and adjust as needed. Candling the eggs, which involves shining a bright light on the egg to check for development, can also help you monitor the progress of the embryos.
  6. Incubation period: The incubation period for chicken eggs is around 21 days. During this time, the embryos will develop and eventually hatch from the eggs.
  7. Common problems: There are some common problems that may arise during incubation, such as low humidity, temperature fluctuations, or eggs that don't hatch. These can be caused by a variety of factors, such as a malfunctioning incubator or poor egg quality. It's important to monitor the incubator regularly and address any problems as soon as possible.

By following these steps and monitoring the incubator regularly, you can successfully incubate chicken eggs and prepare for the arrival of your new chicks. In the next section, we'll cover what to do once the eggs start hatching and how to care for the chicks in a brooder box.

Once your chicks have hatched, it's time to transfer them to a brooder box. A brooder box is a safe and warm environment where the chicks can grow and develop during their first few weeks of life. Here are the steps to follow when raising chicks in a brooder box:

  1. Prepare the brooder box: Choose a box or container that is large enough to accommodate your chicks as they grow. The brooder box should be lined with bedding such as wood shavings or straw to keep the chicks warm and provide traction for them to walk. A heat source, such as a heat lamp, should be set up to maintain the ideal temperature.
  2. Ideal temperature: The ideal temperature for chicks in a brooder box is around 95-100°F (35-38°C) for the first week, gradually reducing by 5°F (3°C) each week until it reaches around 70-75°F (21-24°C). Make sure to monitor the temperature regularly using a thermometer.
  3. Water and food: Provide your chicks with fresh water and food at all times. A waterer and feeder specifically designed for chicks can be used to prevent them from drowning or spilling their food. Starter feed is recommended for the first few weeks, as it contains the necessary nutrients for healthy growth.
  4. Lighting: Provide the chicks with a light source for 24 hours a day during the first few days to help them find the food and water. After that, a 12-14 hour light/dark cycle is recommended.
  5. Ventilation: Proper ventilation is important to prevent the buildup of ammonia and other gases. Make sure the brooder box is well-ventilated, but without any drafts that may harm the chicks.
  6. Cleaning: Regularly clean and change the bedding in the brooder box to maintain a clean and healthy environment for your chicks.
  7. Socialization: Chicks are social creatures and thrive in groups. Provide them with enough space and companionship to prevent stress and encourage healthy socialization.
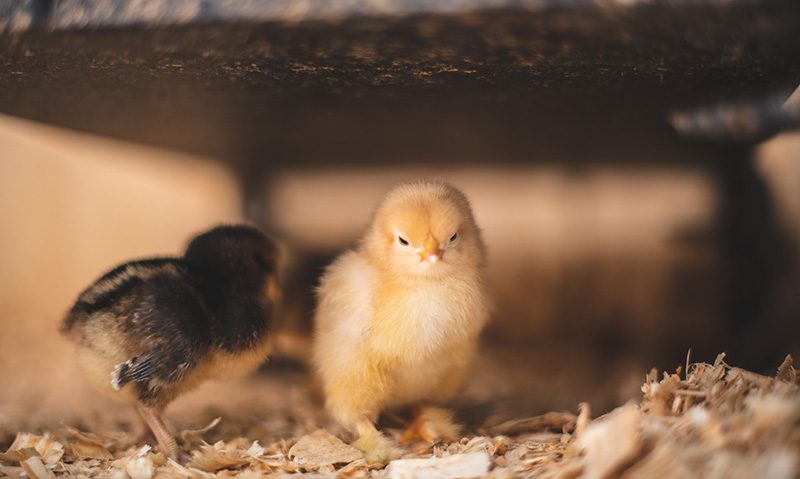
GH Baby Chicks

By following these steps and monitoring the chicks regularly, you can successfully raise your chicks in a brooder box and prepare them for their eventual transition to the coop. With patience and care, you can enjoy the benefits of raising your own flock of chickens.

Here are some additional tips to help ensure successful chicken egg incubation and raising:

  1. Quality of eggs: The quality of the eggs you use for incubation is important. Choose fresh, fertile eggs from healthy chickens to increase the chances of successful hatching.
  2. Egg turning: Consistent egg turning is crucial for the development of the embryo. Set a schedule for turning the eggs and stick to it, such as turning them three times per day.
  3. Candling: Candling the eggs can help you monitor the development of the embryos and identify any problems. Do this regularly, but be gentle and avoid jostling the eggs too much.
  4. Ventilation during incubation: Proper ventilation during incubation is important to ensure healthy development of the embryos. Make sure the incubator has adequate ventilation, but without any drafts.
  5. Nutrition for chicks: Providing proper nutrition for your chicks is crucial for healthy growth and development. Make sure they have access to clean water and starter feed formulated specifically for chicks.
  6. Temperature monitoring: Temperature monitoring is crucial during incubation and raising. Use a reliable thermometer to monitor the temperature in the incubator and brooder box, and adjust as needed.
  7. Socialization for chicks: Chicks are social creatures and need interaction with other chickens to thrive. If possible, introduce them to the rest of your flock gradually, once they are old enough and have been vaccinated.

By following these tips and guidelines, you can increase the chances of successful chicken egg incubation and raising. Remember to be patient, observe your chicks closely, and address any issues promptly. With the right care and attention, you can enjoy the many benefits of raising your own flock of chickens.

High Tunnel

At Gentry Homestead, we utilize a variety of sustainable farming practices to ensure that we are growing healthy, nutritious produce while also minimizing our impact on the environment. One of our key tools in this effort is our grow tunnel, which allows us to start plants from seeds, grow them in a protected environment, and extend our growing season for heat-loving plants.

We start many of our plants from seed in the grow tunnel, which provides a controlled environment with optimal temperature and humidity levels. Once these plants are established, we often transfer them to our raised garden beds or outdoor gardens, but for heat-loving plants like tomatoes and peppers, we keep them in the grow tunnel throughout the growing season. This allows us to extend our harvest season, protect our plants from pests and weather, and ensure that we are able to produce high-quality, delicious produce for our local community.

In addition to starting and growing plants, we also utilize our grow tunnel to support our fruit tree production. During the warmer months of the year in Tennessee, our fruit trees stay in the grow tunnel to create a humid, tropical-like climate that helps them bear fruit. This approach has been highly successful for us, and we are able to produce a variety of fruits, including lemon, limes and grapefruit. By utilizing the grow tunnel in this way, we are able to have locally-grown fruit that is bursting with flavor and nutrition.

Another way we use our grow tunnel is by planting beans every other year. Beans are known to be nitrogen-fixing plants, which means they can help to add nitrogen to the soil. By planting beans in our grow tunnel every other year, we are able to naturally replenish the soil and reduce our reliance on synthetic fertilizers. This approach not only benefits the environment, but also results in healthier, more robust plants and higher-quality produce.

Overall, our grow tunnel is a valuable tool in our efforts to produce high-quality, sustainable produce for our local community. Whether we are starting plants from seed, extending our growing season, or supporting our fruit tree production, the grow tunnel allows us to work with nature to create a thriving, healthy farm ecosystem. At Gentry Homestead, we are committed to providing our local community with fresh, sustainable produce that is bursting with flavor and nutrition. Through our use of innovative farming practices like our grow tunnel, we are able to extend our growing season, support our fruit tree production, and naturally replenish the soil. As a result, we are able to offer a wide variety of fresh produce for sale on our website and at our partner farmstead, Grindstone Gardens. Additionally, we plan to host event days at Gentry Homestead where local community members can come and pick their own produce for a low cost. We believe that by working together with our community, we can create a healthier, more sustainable food system that benefits everyone. Thank you for supporting us on this journey towards a better, more sustainable future.